This page contains affiliate links. We may earn commissions when readers interact with or purchase items through these links. For more information, see our affiliate disclosures here.

W. I. P. G1 ARK Diorama

Post all your customized Transformers here. Whether it's a small mod or a true kitbash, we'd love to see it!

Re: W. I. P. G1 ARK Diorama

Postby Maximal Prime » Mon May 17, 2021 9:04 pm

Motto: "One shall stand...One shall fall."
A nice day outside today gave me the chance to put the first 2 coats of Rustoleum Satin Rustic Orange on the Teletraan-1 pieces.
20210517_194427.jpg

Once it dried I brought it inside and set it up in the diorama, along with a mockup of the walls. I'm really happy with the way it turned out, the paint went on really well and I haven't even added any of the detail pieces, styrene or dry brushing yet.
20210517_204722.jpg

20210517_205059.jpg

On a side note, I ordered a few light-up LED ice cubes from a company called Glowproducts.com. They're $1.99 each and about 1.5" in diameter. The only catch is that they're not perfectly square, so I had to use a bench grinder to shave down 2 sides so they would stack nicely. Not perfect, but I'm happy with them. They'll be a nice addition once the whole diorama is complete.
20210517_210829.jpg

20210517_205529.jpg

All in all, things are headed in the right direction. Since the next few days are going to be rainy, I'm going to try and get some indoor brush painting on the walls done.
Die-cast contruction. It's a lost art.
User avatar
Maximal Prime
Minibot
Posts: 113
Joined: Wed Aug 20, 2003 7:47 am
Location: Crystal Lake, IL
Buy from Maximal Prime on eBay

Re: W. I. P. G1 ARK Diorama

Postby Maximal Prime » Thu May 20, 2021 8:12 pm

Motto: "One shall stand...One shall fall."
For the first few months I was working on this project, I knew I wanted a Teletraan-1 that was plastic, but was worried that I might have to settle for trying to make one out of foam core or even cardboard. Props go out to my wife for suggesting Lego's in the first place and my son for letting me use some of his to create this. Using Lego's has been comparable to using the spray foam for the mountain. It's been a game changer. It has enabled me to make this exactly the way I wanted. Props go out to Dogcades on YouTube for giving me the ideas for lighting this up. I ordered a set of AA battery powered LED Christmas lights for $8.96 and 4 waterproof blue LED button cell battery powered lights for $7.99 from a website called oogalights.com.
20210520_133841.jpg

20210520_170451.jpg

I drilled out holes for the Christmas lights on the front side of the Teletraan-1:
20210520_105228.jpg

To say that I was nervous drilling into already assembled Lego's is an understatement. I had to drill VERY slowly. I then placed the Christmas lights into place and put the blue LED's in place behind the blue tinted transparent Lego's. The result:
20210520_135003.jpg

20210520_135013.jpg

cA1eqGqC-2002599766.jpeg

I also built another companion piece on the right side of the Teletraan-1. Both side pieces have the blue button LED lights inside for effect. Now I have everything outside drying from a last round of paint apps. When the project is complete I'll upload a comprehensive video where you'll be able to see that the Christmas lights have a random blinking feature or a solid steady light. Hopefully next week I can start gluing on some of the raised details like a keyboard, Autobot symbol, etc.
20210520_142931.jpg
Die-cast contruction. It's a lost art.
User avatar
Maximal Prime
Minibot
Posts: 113
Joined: Wed Aug 20, 2003 7:47 am
Location: Crystal Lake, IL
Buy from Maximal Prime on eBay

Re: W. I. P. G1 ARK Diorama

Postby Maximal Prime » Sat May 29, 2021 2:52 pm

Motto: "One shall stand...One shall fall."
This last week I haven't had any time to put into the project until today. I've been brainstorming how I'm going to build the interior and connect the 2 bases. This morning I was able to put together a very rough mock-up of how the interior will look. This is definitely subject to change but it gives a basic idea how the interior layout will look.
20210529_113912.jpg

20210529_113859.jpg

20210529_113259.jpg

I added Skyfire for a scale comparison. More than enough headroom. Originally I had thought about putting Teletraan-1 on the back wall across from the tunnel entrance, but I wasn't crazy about the way that layout looked. I'm somewhat limited to the dimension by the size of the base, and I wanted the layout at least a little close to the way it was on the show. As much as I wanted it to be to scale, I had to sacrifice accuracy to a degree to make this all fit. I have a plan for the ceiling with LED lights on a remote that will shine down, along with stalactites hanging down. The ceiling will only come to about the Dinobot cave, that way I can reach the Teletraan-1 and not have to climb inside the thing to set stuff up, lol
Die-cast contruction. It's a lost art.
User avatar
Maximal Prime
Minibot
Posts: 113
Joined: Wed Aug 20, 2003 7:47 am
Location: Crystal Lake, IL
Buy from Maximal Prime on eBay

Re: W. I. P. G1 ARK Diorama

Postby Maximal Prime » Sun May 30, 2021 10:19 am

Motto: "One shall stand...One shall fall."
Got a little bit of building done this morning. I had originally thought about creating the walls in pieces, but I wanted something sturdier that was mostly all one piece. The closest thing I found on the cheap was a 48" longX21"highX24"wide cardboard wardrobe box at the local U-Haul for a couple dollars. The 48" length is perfect. Ideally I wanted the interior to be 24" high, but 21" is still plenty of ceiling height without feeling too cramped.
20210529_174255.jpg

20210530_091801.jpg

I did have to apply 8" extensions, where the ceiling will connect to the mountain base. I'm going to drill out some slots in the rubber tote on the right where I can put a connecting piece that will be an extra support for the ceiling. Since the 3 bases need to be able to separate, I still need to build the Ark interior in a way that it will all be supported and not collapse when it's apart. I have a plan for adding support struts behind the cardboard box out of sight. I was also able to pick up this giant plastic recyclable tray out of the recycling bin at work. I'm going to spray paint this and make this part of the ceiling where the LED lights will shine down.
20210530_085056.jpg

I cut a hole in the ceiling and sized it to fit.
20210530_100641.jpg

My next step will be to spray paint this part of the ceiling and a few other odds and ends on the interior of the Ark this week.
Die-cast contruction. It's a lost art.
User avatar
Maximal Prime
Minibot
Posts: 113
Joined: Wed Aug 20, 2003 7:47 am
Location: Crystal Lake, IL
Buy from Maximal Prime on eBay

Re: W. I. P. G1 ARK Diorama

Postby Maximal Prime » Tue Jun 01, 2021 1:34 pm

Motto: "One shall stand...One shall fall."
Got some nice weather this morning and spray painted the ceiling and some other pieces.
20210601_120551.jpg

I managed to pick up some LED puck lights awhile back that change color with a remote. They sized perfectly into the 3 holes in the ceiling piece. I mounted those and did a fit test with the ceiling. It's hard to tell in the pictures, but when the red light is selected, it gives off a pretty cool Star Trek-ish red alert effect that makes the whole interior glow red.
20210601_130318.jpg

20210601_130300.jpg

Now I need to start measuring the foam board for the walls, spray gluing the Ark panels to the walls, and the walls to the cardboard frame. Then I plan on anchoring the box permanently to the MDF base. Once that is done, there's a whole ton of little details I want to add inside:
1. Stalactites and rock from the ceiling and walls, giving it a beat-up look like this ship crashed and parts caved in.
2. Finishing the blast door to the tunnel.
3. Adding "L" shaped brackets on the inside. Not only will it help support everything, it will add detail to the structure of the interior.
4. Build the connector support pole from the box ceiling to the back of the mountain.
5. Add a few more lights and finish off the area above the tunnel entrance.
6. Finish adding glued details to Teletraan-1.
7. Dry brush weathering details to the ceiling, "L" brackets, Teletraan-1 and modules next to it, and then clear coat it all.
8. Finish adding a few more bushes and greenery to the exterior base.
9. Finish painting the backgrounds on the exterior.
10. Add a removable "top" to the volcano with the last can of spray foam I have and then paint that.

When all of that is done, I can bring this beast outside one last time and finish spray painting the rest of the rock on the mountain.

I feel like I'm finally nearing the home stretch with this project. 25% more left to do. :D
Die-cast contruction. It's a lost art.
User avatar
Maximal Prime
Minibot
Posts: 113
Joined: Wed Aug 20, 2003 7:47 am
Location: Crystal Lake, IL
Buy from Maximal Prime on eBay

Re: W. I. P. G1 ARK Diorama

Postby Maximal Prime » Wed Jun 02, 2021 9:39 am

Motto: "One shall stand...One shall fall."
Built a wall this morning. Measured a few pieces of foam board and spray glued that to the inside of the box. I didn't want any bubbling or warping on the surface of the Ark wall. Once that was dry, I cut and measured the Ark wall panels and spray glued those to the foam board. Now I'll have to repeat this process for the whole rest of the interior of the Ark, including the ceiling.
20210602_094121.jpg

20210602_095110.jpg

I measured the panels in such a way that the four corner seam will be behind the Teletraan-1. It should provide for a slightly more seamless look.
Die-cast contruction. It's a lost art.
User avatar
Maximal Prime
Minibot
Posts: 113
Joined: Wed Aug 20, 2003 7:47 am
Location: Crystal Lake, IL
Buy from Maximal Prime on eBay

Re: W. I. P. G1 ARK Diorama

Postby Maximal Prime » Sat Jun 05, 2021 11:01 am

Motto: "One shall stand...One shall fall."
Made a little progress. I measured out the foam board for the ceiling around the light tray, and then it was the painstaking process of measuring every piece of Ark wall to fit seamlessly. I'm really glad I printed all these walls on 120# cardstock, they are flat as can be. Had I done these on paper, the spray glue would have warped and bubbled the surface horribly. The custom piece with the window was from a different file and as such, the color is slightly darker than the rest. I plan on running some small tubing as a pipe to somewhat disguise the difference between the panels. I couldn't really line up the graphics perfectly, but with the Ark walls being so detailed, from a distance it's hard to tell. Or I'm just a perfectionist and my own worst critic, lol
20210604_081634.jpg

20210605_080736.jpg

20210605_105249.jpg

Brought the gang in for a mock-up. I still have to add the supports and connector piece in the next few days. But Prime is happy, the Autobots finally have a home!
20210605_111720.jpg

20210605_111704.jpg
Die-cast contruction. It's a lost art.
User avatar
Maximal Prime
Minibot
Posts: 113
Joined: Wed Aug 20, 2003 7:47 am
Location: Crystal Lake, IL
Buy from Maximal Prime on eBay

Re: W. I. P. G1 ARK Diorama

Postby Maximal Prime » Thu Jun 10, 2021 8:38 pm

Motto: "One shall stand...One shall fall."
Very small update:
Very busy workweek and not much time to work on this. I did however manage to anchor the box frame of the Ark interior to the MDF base. I drilled out a few holes in the "L" shaped shelf supports to accommodate 5/8" threaded screw and anchored it to the box. I also screwed it in on the bottom straight to the MDF base. Once I get a few more screw/washer/nut sets I will repeat that process where the wall meets the ceiling so the corners are supported with minimal sag.
20210610_143219.jpg

20210610_143229.jpg

I also painted a few left over pieces of old PVC pipe I had laying around the house to use as pipework detail inside the ARK. I'm going to give them some paint weathering detail before I attach them permanently.
20210610_145952.jpg
Die-cast contruction. It's a lost art.
User avatar
Maximal Prime
Minibot
Posts: 113
Joined: Wed Aug 20, 2003 7:47 am
Location: Crystal Lake, IL
Buy from Maximal Prime on eBay

Re: W. I. P. G1 ARK Diorama

Postby Maximal Prime » Sun Jun 13, 2021 12:43 pm

Motto: "One shall stand...One shall fall."
This morning I was able to give the pipes some weathering detail. I've watched a couple of videos of guys who do phenomenal paint jobs on model train sets and tried to apply a few of the tricks and techniques they use:
20210613_115053.jpg

For the longest time I've been kind of putting off the inside back of the Ark, I just wasn't sure exactly how I wanted to do it or really have it look. This morning I finally faced it head on and decided how I was going to tackle it. I found an empty cardboard box that was just the right size:
20210613_092226.jpg

I started cutting more of those Ark panels and glued them to the box
20210613_122549.jpg

Then I measured out and drilled a couple of holes and cut a few more Ark panels to line the inner top and sides of the tunnel:
20210613_112058.jpg

20210613_114527.jpg

Then I pulled some of the extra white Christmas lights from the pile that were being used inside the tunnel, and placed and taped them securely inside the new box.
20210613_120429.jpg

I just have to adjust a few corners and then use some extra foam I cut off of bigger pieces of the mountain I saved to fill in a few gaps. The cool part is the box is removable, in case I ever need to get to the lights.

Hopefully this week I can finally finish the blast door to the tunnel, as well as the inside wall to the left of the tunnel.
Die-cast contruction. It's a lost art.
User avatar
Maximal Prime
Minibot
Posts: 113
Joined: Wed Aug 20, 2003 7:47 am
Location: Crystal Lake, IL
Buy from Maximal Prime on eBay

Re: W. I. P. G1 ARK Diorama

Postby Maximal Prime » Mon Jun 14, 2021 9:24 pm

Motto: "One shall stand...One shall fall."
I did manage to get a little more work done on the wall above the tunnel. Due to my work, school and family schedule any progress is going to be in small steps from here on out.
20210614_183751.jpg
Die-cast contruction. It's a lost art.
User avatar
Maximal Prime
Minibot
Posts: 113
Joined: Wed Aug 20, 2003 7:47 am
Location: Crystal Lake, IL
Buy from Maximal Prime on eBay

Re: W. I. P. G1 ARK Diorama

Postby Maximal Prime » Sat Jun 19, 2021 7:04 am

Motto: "One shall stand...One shall fall."
The back wall of the Ark interior is finally starting to take shape. I glued some details on to the wall, measured a lower panel and now wait for the glue to dry. Then I will start painting the details before adding a little spray foam in certain spots to fill in any gaps.
20210619_072832.jpg

The other part of my morning was spent building a top to the Ark interior base out of foam board. It will essentially be a giant removable cap that sits on top. I'm going to spray foam it and paint it so it adds to the mountain on the backside.
20210619_073119.jpg
Die-cast contruction. It's a lost art.
User avatar
Maximal Prime
Minibot
Posts: 113
Joined: Wed Aug 20, 2003 7:47 am
Location: Crystal Lake, IL
Buy from Maximal Prime on eBay

Re: W. I. P. G1 ARK Diorama

Postby Maximal Prime » Sat Jun 19, 2021 3:25 pm

Motto: "One shall stand...One shall fall."
A little more progress today. Now the back wall is really coming together. Next step is to finish the edges around the blast door, dry brush some details on the new wall and finish the little pieces of frame that will keep the blast door in place.
20210619_155433.jpg

Right now the Ark/mountain cap is 80% spray foamed and drying in the garage. I just have to spray foam the sides of the cap once I get another can of spray foam.
20210619_160422.jpg
Die-cast contruction. It's a lost art.
User avatar
Maximal Prime
Minibot
Posts: 113
Joined: Wed Aug 20, 2003 7:47 am
Location: Crystal Lake, IL
Buy from Maximal Prime on eBay

Re: W. I. P. G1 ARK Diorama

Postby Maximal Prime » Tue Jun 22, 2021 9:22 pm

Motto: "One shall stand...One shall fall."
Taking advantage of a non-rainy day to finish the bulk of the painting on the mountain!
20210622_174702.jpg

I'm also painting the cap to the Ark interior, as well as some stalactites I plan on putting on the ceiling.
20210622_172721.jpg
Die-cast contruction. It's a lost art.
User avatar
Maximal Prime
Minibot
Posts: 113
Joined: Wed Aug 20, 2003 7:47 am
Location: Crystal Lake, IL
Buy from Maximal Prime on eBay

Re: W. I. P. G1 ARK Diorama

Postby Short Circuit » Wed Jun 23, 2021 4:08 pm

Weapon: Dual-Sonic Disrupter Gun
This is coming out amazingly well, keep up the awesome work! ;)^
User avatar
Short Circuit
Fuzor
Posts: 216
Joined: Sat Oct 24, 2009 2:06 pm
Alt Mode: Cybertronian Micro-Jet
Strength: 3
Intelligence: 8
Speed: 6
Endurance: 5
Rank: 2
Courage: 6
Firepower: 3
Skill: 5

Re: W. I. P. G1 ARK Diorama

Postby Maximal Prime » Fri Jun 25, 2021 6:17 pm

Motto: "One shall stand...One shall fall."
Tiny bits of progress. I gave the computer modules a bit of rusty weathering and lightly hit some of the corners with silver paint.
20210625_092626.jpg

20210625_092600.jpg

I also gave the mountain rocks on the inside a spray paint of different browns. I think I might add another support on the back of the diorama to help with the sag. It's a little more exaggerated in the picture than in person.
20210625_092836.jpg

20210625_092812.jpg
Die-cast contruction. It's a lost art.
User avatar
Maximal Prime
Minibot
Posts: 113
Joined: Wed Aug 20, 2003 7:47 am
Location: Crystal Lake, IL
Buy from Maximal Prime on eBay

Re: W. I. P. G1 ARK Diorama

Postby Maximal Prime » Mon Jul 05, 2021 7:00 pm

Motto: "One shall stand...One shall fall."
I have not forgotten about this project, it is still being worked on! Just in small steps at the moment. Right now it is small, detail oriented tasks that I really only have time to work on in the early morning.
I did finish carving and spray painting the stalactites that I will glue inside the Ark ceiling:
20210705_175650.jpg

I also spray foamed, carved and painted the back corner of the outside of the Ark:
20210705_172500.jpg

It was then a tedious process of cutting styrene, and attaching it to pieces, gluing parts together and painting some of the smaller pieces for the Ark interior. I also permanently glued some of the pipe work into the wall:
20210705_172415.jpg

20210705_172313.jpg

I am now under then gun with trying to get this project finished, as we will be moving in 2 months. My goal now is to get this project finished by August 1st so I can have a day with an empty room to do a finished display and a video. Our new place will have the space to put the project, but the logistics of putting it together and where is yet to be determined. Wish me luck!
Die-cast contruction. It's a lost art.
User avatar
Maximal Prime
Minibot
Posts: 113
Joined: Wed Aug 20, 2003 7:47 am
Location: Crystal Lake, IL
Buy from Maximal Prime on eBay

Re: W. I. P. G1 ARK Diorama

Postby Maximal Prime » Wed Jul 07, 2021 5:25 pm

Motto: "One shall stand...One shall fall."
This morning I started the task of painting all the little details, from pipes and pieces, to the supports and Teletraan-1.
20210707_071101.jpg

I also picked up these cake toppers a while back at the hobby store:
20210707_075439.jpg

I painted these to match the Teletraan-1, two of the screens I plan on putting custom stickers on and gluing to the Teletraan-1, the other laptop style one I'm going to glue to one of the side modules. The next week is going to be doing this every morning and adding rust and weathering to everything.
20210707_113511.jpg
Die-cast contruction. It's a lost art.
User avatar
Maximal Prime
Minibot
Posts: 113
Joined: Wed Aug 20, 2003 7:47 am
Location: Crystal Lake, IL
Buy from Maximal Prime on eBay

Re: W. I. P. G1 ARK Diorama

Postby Maximal Prime » Sun Jul 11, 2021 8:28 am

Motto: "One shall stand...One shall fall."
Getting closer! I managed to finish a TON of little details that had been on my to do list for weeks. First thing I did was add some pipe work under the broken viewscreen:
20210711_065742.jpg

Next I added a component along the Teletraan-1 wall. I took some AV wire and glued it to the post and then glued the post in place. Originally I wanted it to light up, but in the end I scratched that idea.
20210711_065729.jpg

The next piece I added was the laptop style computer to one of the side modules and made a custom screen label. Nothing super fancy, but the lid is still on the hinge so it can open or close:
20210711_064320.jpg

The next order of business was to finally finish Teletraan-1!
20210711_085526.jpg

After I finished giving it the weathered paint and touches of silver, I glued a custom monitor screen to the right of the main screen, added the keyboards and the display above it.
Then I added more pipe work to the wall across from the Dinobot cave:
20210711_085920.jpg

When I make a med-bay table to repair Autobots, that's probably where I'll put it, in between those two pipes along the wall.
Then I added some stalactites in three places hanging from the ceiling:
20210711_071632.jpg

The interior is 98% done. All I have to do is finish the blast door and stabilizer, add a few more foam rocks to close up that gap in the back corner and add some touch up paint.
Die-cast contruction. It's a lost art.
User avatar
Maximal Prime
Minibot
Posts: 113
Joined: Wed Aug 20, 2003 7:47 am
Location: Crystal Lake, IL
Buy from Maximal Prime on eBay

Re: W. I. P. G1 ARK Diorama

Postby Maximal Prime » Wed Jul 14, 2021 10:49 pm

Motto: "One shall stand...One shall fall."
Some more little stuff I got done this morning. I glued and painted the support pole from the mountain base to the Ark base that helps hold up the ceiling:
20210711_204657.jpg

I added the soft part of a velcro strip for the bottom of the blast door, that way as it slides it won't be abrasive or scratch the painted floor:
20210711_194534.jpg

Then I cut out a piece of plastic for the tunnel side of the blast door I plan on applying a sticker on, to make a raised Autobot symbol:
20210714_072054.jpg

I added a guide system and two module pieces that will hold the blast door in place and allow it to slide:
20210714_224654.jpg

And I finished gluing the rest of the plastic pieces to the blast door:
20210714_224730.jpg

Now it's a matter of letting the glue dry on everything and then this weekend having Grapple's crew get busy painting all kinds of finishing details. ;)
Die-cast contruction. It's a lost art.
User avatar
Maximal Prime
Minibot
Posts: 113
Joined: Wed Aug 20, 2003 7:47 am
Location: Crystal Lake, IL
Buy from Maximal Prime on eBay

Re: W. I. P. G1 ARK Diorama

Postby Maximal Prime » Sun Jul 18, 2021 9:20 am

Motto: "One shall stand...One shall fall."
Micro update:
I finally finished the blast door to the Ark interior:
20210716_194812.jpg

20210716_194823.jpg

I also finished the last of the major spray painting outside by giving the last coats to the background boards:
20210717_124414.jpg

Now it is all small details left to finish:

1. Finish painting the background boards by hand.
2. Finish the last of the spray foam rock in the interior back corner gap.
3. Add a few more trees, bushes and greenery on the exterior.
4. Finish any paint touch ups by hand on the exterior.
5. Build a Sky Spy.
6. I may or may not be able to finish a med-bay table in time. It's not a deal breaker if I don't. I can always add it later.

Once these details are finished, this project is done! Two weeks to go!
Die-cast contruction. It's a lost art.
User avatar
Maximal Prime
Minibot
Posts: 113
Joined: Wed Aug 20, 2003 7:47 am
Location: Crystal Lake, IL
Buy from Maximal Prime on eBay

Re: W. I. P. G1 ARK Diorama

Postby Maximal Prime » Fri Jul 23, 2021 9:23 am

Motto: "One shall stand...One shall fall."
Almost done! The Ark itself is finished. I only have 3 things left to do on my list.
I used one more can of spray foam for the back corner where the two bases meet:
20210723_092614.jpg

Once it is fully dried over this weekend, I will take it off the black plastic and carve and paint it. It will just be a separate piece much like the cap that sits over the Ark interior. I may glue a magnet in there so it sits over that gap securely without moving. Once it's painted, from the inside of the Ark it will just look like more rock.
I also added a few different species of trees and a few bushes, along with some slight paint highlights on the rocks:
20210719_153123.jpg

20210719_153106.jpg

This morning I am finishing the painting on the first of the 5 background boards:
20210723_093601.jpg

I know my technique of using a sponge brush may seem odd, but it works for me. The only thing left to do after these items is to finish the Sky Spy this week.

As such, this will be my last post on this project. I will start a new thread of the completely finished project in the next week or so, once I have all the finished photos taken. I will also be taking some regular video and doing a POV video of Optimus driving down the road and into the Ark that I will add to YouTube.

Thank you all for coming with me on the journey, your feedback and kind words. It's been a fun ride! Till all are one!
Die-cast contruction. It's a lost art.
User avatar
Maximal Prime
Minibot
Posts: 113
Joined: Wed Aug 20, 2003 7:47 am
Location: Crystal Lake, IL
Buy from Maximal Prime on eBay

Previous

Return to Customizations

Registered users: Bing [Bot], Google [Bot], Google Adsense [Bot], UltOrange

Transformers and More @ The Seibertron Store

Visit our store on eBay
These are affiliate links. We may earn commissions when you purchase items or services through these links.
Visit shop.seibertron.com to buy "VOID RIVALS #13 Cvr A Image Comics 2024 0824IM464 13A (CA) De Felici (W) Kirkman"
NEW!
VOID RIVALS #13 Cv ...
Visit shop.seibertron.com to buy "VOID RIVALS #13 Cvr E 1:50 Image Comics 2024 0824IM468 13E (CA) Lim (W) Kirkman"
NEW!
VOID RIVALS #13 Cv ...
Visit shop.seibertron.com to buy "COBRA COMMANDER #5 2nd ptg Pythona Image Comics 2024 5B 0524IM970 (CA) Howard"
NEW!
COBRA COMMANDER #5 ...
Visit shop.seibertron.com to buy "VOID RIVALS #10 2nd ptg Image Comics 2024 0524IM969 (CA) Howard (W) Kirkman"
NEW!
VOID RIVALS #10 2n ...
Visit shop.seibertron.com to buy "VOID RIVALS #13 Cvr G Image Comics 2024 0824IM470 13G (CA) Blank Sketch"
NEW!
VOID RIVALS #13 Cv ...
Visit shop.seibertron.com to buy "VOID RIVALS #13 Cvr F 1:100 Image Comics 2024 0824IM469 13F (CA) Lullabi"
NEW!
VOID RIVALS #13 Cv ...
Visit shop.seibertron.com to buy "COBRA COMMANDER #5 Cvr B Image Comics 2024 5B 0324IM215 (CA) Santolouco"
NEW!
COBRA COMMANDER #5 ...
Visit shop.seibertron.com to buy "VOID RIVALS #10 Cvr B Image Comics 2024 0424IM352 10B (CA) Walker (W) Kirkman"
NEW!
VOID RIVALS #10 Cv ...
Visit shop.seibertron.com to buy "VOID RIVALS TP Vol 01 Image Comics 2024 1223IM247 TPB (CA) De Felici (W) Kirkman"
NEW!
VOID RIVALS TP Vol ...
Visit shop.seibertron.com to buy "VOID RIVALS #13 Cvr C 1:10 Image Comics 2024 0824IM466 13C (CA) Romero"
NEW!
VOID RIVALS #13 Cv ...
Visit shop.seibertron.com to buy "DESTRO #3 Cvr A Image Comics 2024 0624IM279 3A GI JOE (CA) Bressan (W) Watters"
NEW!
DESTRO #3 Cvr A Im ...
Visit shop.seibertron.com to buy "VOID RIVALS #3 Cvr B Image Comics 2023 JUN230376 3B (CA) Harren (W) Kirkman"
NEW!
VOID RIVALS #3 Cvr ...
Visit shop.seibertron.com to buy "VOID RIVALS #13 Cvr D 1:25 Image Comics 2024 0824IM467 13D (CA) Zaffino + Lokus"
NEW!
VOID RIVALS #13 Cv ...
Visit shop.seibertron.com to buy "VOID RIVALS #13 Cvr B Image Comics 2024 0824IM465 13B (CA) De Iulis (W) Kirkman"
NEW!
VOID RIVALS #13 Cv ...
* Price and quantities subject to change. Shipping costs, taxes and other fees not included in cost shown. Refer to listing for current price and availability.
Find the items above and thousands more at the Seibertron Store on eBay
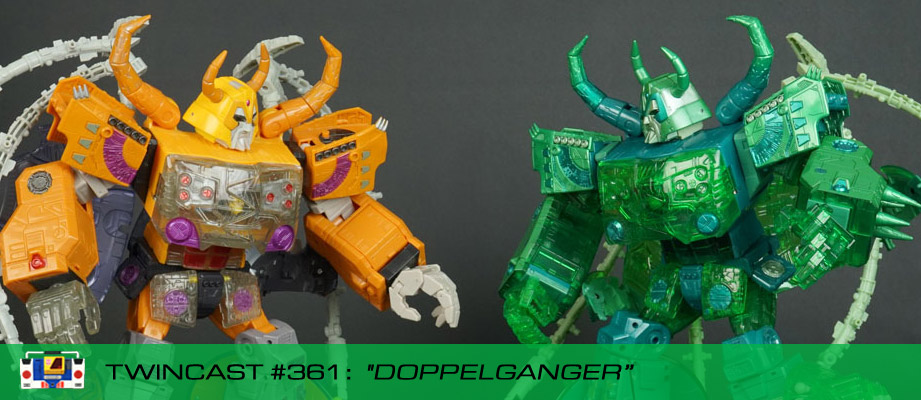
Transformers Podcast: Twincast / Podcast #361 - Doppelganger
Twincast / Podcast #361:
"Doppelganger"
MP3 · iTunes · RSS · View · Discuss · Ask
Posted: Saturday, October 19th, 2024

Featured Products on Amazon.com

These are affiliate links. We may earn commissions when you purchase items or services through these links.
Buy "Transformers Authentics Optimus Prime" on AMAZON
Buy "Transformers Generations Power of The Primes Voyager Class Elita-1" on AMAZON
Buy "Transformers Deluxe Ratchet Action Figure" on AMAZON
Buy "Transformers Titans Return Repugnus, Dastard, and Solus Prime Prime Master" on AMAZON
Buy "Transformers Studio Series 13 Voyager Class Movie 2 Megatron" on AMAZON
Buy "Cyberverse Warrior Class Windblade" on AMAZON
Buy "Cyberverse Warrior Class Acid Storm" on AMAZON
Buy "Cyberverse Warrior Class Megatron" on AMAZON
Buy "Transformers Generations Combiner Wars Deluxe Class Decepticon Vortex(Discontinued by manufacturer)" on AMAZON
Buy "Transformers: Robots in Disguise Combiner Force Team Combiner Menasor, 8.5-inch" on AMAZON
Buy "Transformers Generations Titans Return Autobot Sovereign and Alpha Trion" on AMAZON
Buy "Transformers Generations Titans Return Titan Master Brawn" on AMAZON